Showing posts with label food and drink. Show all posts

Raclette with GreenVale Farm Fresh Potatoes


When I heard from GreenVale Farm Fresh, the first thing that popped into my mind was Postman Pat - he lives in the fictional village of Greendale ! - but no, this was nothing to do with bags of mail or black and white cats. They wanted me to try out a bag of their spuds, marketed as ‘tasty, all rounder potatoes’ using the Jelly variety of potato. The press release explained : "They have a delicious, creamy buttery taste, a lovely yellow flesh and are great boiled, roasted, baked, mashed or chipped - in fact, they’re so versatile, you can use them for all your potato needs. GreenVale Farm Fresh also come in an old style paper potato sack (2kg) that are more environmentally friendly and keep the potatoes fresher for longer."

I was very impressed with how clean and healthy they look - there were absolutely no eyes, green or black bits, in fact nothing at all dodgy-looking that needed peeling or slicing off. They're also pre-washed so you don't have to get covered in mud as you wash/peel them ! The second thing that really appealed to me was the size - they're perfect for baked potatoes so would be ideal if you want to knock some of those up for Bonfire Night.


As the cold weather hit this weekend and it was a really foul Sunday with gale force winds and lashings of rain, we decided to go for a fab French winter dish : raclette. Not only is it really warming comfort food, the raclette grill warms up the house as you eat ! I boiled the GreenVale Farm Fresh Potatoes without peeling or chopping them and we were impressed at how well they retained their texture, not going soggy or falling apart. Once cooked through, they were popped on top of the raclette grill which gave them a lovely crispy skin.


A potato sliced on the plate, served with salad, tomatoes, pickles and smoked meats, all drizzled in melted raclette cheese - yum !


Raclette is a really fun family meal too because the kids always love melting the cheese in the little paddles and pouring it on their potatoes and meat !

To use up the leftover cooked potatoes, I fried them in a little olive oil and served them with fishfingers for the kids for tea, which also worked really well. Potatoes can sometimes be quite bland, but we did find that these ones had a lovely flavour.

star rating : 5/5

RRP : £2.50 for 2kg

available from Tesco nationwide and from Booths in the North East

for more information : http://www.greenvalefarmfresh.co.uk

Disclosure : I received some potatoes in order to try them out and write an honest review.

Other blogposts you may be interested in :

This week's must-try recipes 14/10/13

Time for another round-up of tasty treats and dishes that I've spotted in the blogosphere over the past couple of weeks - yum ! I know what I'll be making during the school holidays !


A 2-minute mug cake that looks utterly gorgeous from Gingey Bites  - this one is begging to be tried when the kids get home from school on a cold, rainy afternoon !


Alison at Dragons and Fairy Dust made these Mincemeat Biscuits which will be ideal for using up a jar of mincemeat that's lurking in the back of my cupboard.


An American classic that I've often heard of but never tried - Snickerdoodles from United Cakedom.


There seems to be a definite cake theme going on this week ! Romanian Mum's Halloween Pumpkin Cupcakes sound perfect as a half term project too.


And a savoury option to finish with from the ever-talented Galina - I love the look of these Golubtsy in Tomato Sauce.

Hmmmm !

Other blogposts you may be interested in :

Kid-friendly recipe : Smiley Spiral Apple tarts

Fabulous Crispello dessert ideas


Having a full-time job seriously cramps your blogging style sometimes. A little while ago, I was invited to a fabulous event making sumptuous desserts using Cadbury's Crispello alongside celebrity chef Lily Vanilli. I couldn't make it, which I was slightly gutted about, but those fabulous people at the Cadbury's Press Office sent me over the recipes and several bags of Crispello so that we could have fun recreating them at The Madhouse.

We decided to have a go at recreating this showstopper of a dessert that would be ideal as an edible centrepiece for a festive dinnertable : the Christmas Tower. (Now I'd have called it a Crispello-mas Tower - I should have got a job in advertising !)

Here's the original version.

Christmas Tower


Ingredients:

Approx 60 Cadbury Crispello pieces (approximately 6 sharing bags)
150g milk or dark chocolate
Optional : Decorate with wafer or edible flowers

Dip the base of a Cadbury Crispello in melted chocolate and start to stick the pieces in place in a pyramid shape. Drizzle your Cadbury Crispello pieces in melted milk or white chocolate. (Lily’s Tip... Cut some of the Crispello pieces in half for a more creative feel!) Add the finishing touches with some wafer pieces, edible flowers and crushed Cadbury Crispello pieces.


Well, we decided that 6 whole sharing bags was an awful lot so we went for a smaller version. Juliette happy went through a couple of bags unwrapping them all and stacking them up.


To avoid using hot chocolate which could be slightly dangerous for little fingers, we used chocolare ice cream sauce and sprinkles instead.


It may not be as impressive as the original but we happily polished it off as dessert ! This would be a great "make it then eat it" activity for a kids' party too.

There are another two recipes for us still to try out :

Cadbury Crispello Ice Cream


Ingredients :
300ml whole milk
1 vanilla pod, split down the middle
8 egg yolks
100g caster sugar
250ml double cream
12 Cadbury Crispello Double Choc or Vanilla Velvet pieces

To make the ice-cream:

1. Pour the milk into a pan, add the vanilla pod and bring slowly up to a high temperature – do not let it boil. Leave to cool and infuse with the vanilla for approximately 1 hour. Once cool, remove the vanilla pod from the pan and scrape out the seeds into the milk.

2. In a bowl, beat together the egg yolks and sugar until thick and fluffy – this takes 4 minutes. Pour in the vanilla milk and stir until you get a thin custard.

3. Pour the mixture into a heavy-bottomed pan, place over a medium heat and stir continuously with a wooden spoon as you slowly heat through. When the custard has thickened and the foam bubbles on the
surface have disappeared, remove it from the heat, whisk it for a couple of minutes with a large balloon whisk then pour into your cold, dry metal bowl.

4. Leave it to cool for approximately 10 minutes, stirring occasionally to prevent a skin forming.

If churning by hand: Once the mixture is cool then put it into the fridge for 1–2 hours. Remove and stir in the cream and gently crush and stir in the Cadbury Crispello pieces. Put into the freezer for half an hour, then
churn before placing in the freezer to set completely.

If churning in an ice cream maker: Once the mixture has cooled, stir in the cream, gently crush and stir in the
Cadbury Crispello pieces, churn for 30–35 minutes, then place in the freezer to set completely.

To serve : Scoop out the set ice cream, add additional Cadbury Crispello Double Choc or Vanilla Velvet pieces on top for decoration!


Cadbury Crispello Mille Feuille

Ingredients :

250g the best quality all butter puff pastry you can buy (or make your own!)
30g cocoa powder (plus extra for dusting)
12 x pieces of Cadbury Crispello Double Choc or Vanilla Velvet

For the chocolate cream:
60g icing sugar (sifted)
60g unsweetened cocoa powder (sifted)
¼ tsp pure vanilla extract
500ml cold double cream

To make the pastry:

1. Get your pastry to a temperature that is just ‘rollable’ but no softer.
2. Lightly flour a surface and roll out the pastry to form a rectangle around 3mm thickness.
3. Sift half of your cocoa powder evenly over the surface.
4. Fold the right half of the pastry into the centre, then the left to meet in the centre. Dust with the rest of the cocoa powder and fold the top and bottom to meet in the centre once again.
5. Now roll the pastry out again into a rectangle around 3mm thickness.
6. Transfer to a baking tray lined with baking paper.
7. Prick all over with a fork, place another sheet of baking paper on top and weigh this down with a baking tray on top.
8. Bake this for 10-15mins or until just starting to brown.
9. Remove the top tray and return to bake until crisp and browning all over.
10. Remove and leave to cool.

To make the chocolate cream:

1. Combine the icing sugar and cocoa.
2. Pour your cream into a metal bowl and whip thoroughly and evenly with a hand mixer, beginning on a medium speed.
3. When the cream starts to thicken and you see the first sign of soft peaks, add the combined sugar and cocoa one tbsp. at a time, then add the vanilla.
4. Now reduce the speed to medium -low and continue just until you have a foamy consistency.

To assemble

1. Cut your cooled pastry into rectangles (approx 4.5cm x 7cm).
2. Now pipe or gently spread a thin layer of the cream onto a rectangle of pastry.
3. Top with a layer of Cadbury Crispello (you might like to crush these first), pipe/spread another layer of cream, then
top with another rectangle of pastry.
4. Transfer to a plate and sift a dusting of cocoa over the Cadbury Crispello Mille Feuille
5. Decorate with fruit, edible flowers or whatever takes your fancy!

For further information please visit www.facebook.com/cadburyuk

Disclosure : We received some bags of Crispello in order to try out the recipes.

Other blogposts you may be interested in :

Kid-friendly recipe : Smiley Spiral Apple tarts

New & Improved Little Dish Toddler Meals review


Little Dish, who pride themselves on providing proper food for little ones, got in touch recently to see if we'd like to try two of their new products. They have modified their already popular Fish Pie recipe so that it now contains MSC approved wild salmon, improving both taste and levels of Omega 3.


And they have also come up with a brand new recipe -  Mini Cheese Ravioli in a Tomato and Veg Sauce - in response to the large number of parents who wanted some extra vegetarian options in the range. They explain : "Little Dish’s new Mini Cheese Ravioli in a Tomato and Veg Sauce gives little ones 2 of their 5 a day of vegetables in one delicious meal. The mini pasta pieces are the perfect size and texture for little mouths and the sauce contains yummy chunks of vegetables to help little ones develop a taste for healthy grown-up textures. Just like all of the Little Dish meals, this new arrival is of course made from 100% natural ingredients, is low in salt, contains no added sugar and no additives or preservatives."


First I warmed up the  Fish Pie in the microwave - it only takes 2 & 1/2 minutes, but be warned, it comes out way too hot to eat so let it cool down a while before serving. The packaging promises a cheesy salmon and pollock pie made with finely chopped spinach and delicious mashed potato. I was a bit confused when I peeled off the plastic film because I could see a large chunk of white fish floating in a creamy sauce but no potato. Hmmm. I mashed it all up and decided that it is all blended together so the fishy lump in the middle is actually a mixture of fish and mash.


As the fish pie cooled down, I zapped the ravioli. They were a bit congealed and stuck together but I picked them apart with a fork and they actually looked quite appetising, even to me ! Little Dish meals are suitable for children aged 1 year+, so I wasn't sure what my considerably older testers would think.


Well, 8-year-old Juliette did ask (with a grin) if it was baby food then proceeded to wolf the whole lot down, declaring it "even nicer than the fish pie at the canteen".


4-year-old Pierre was equally pleased with his dish of ravioli and ate the whole lot, although he did complain that they were too hot and that he burned his mouth, despite me letting them stand for a while before giving them to him.

They were an ideal quick solution after a long day and work and - even better - as I served them straight from the dish, there wasn't even any washing up to deal with !

star rating : 4.5/5

RRP : £2.50 for 200g

Disclosure : We received the products in order to write an honest review.

Other reviews you may be interested in :

Giveaway #328 : Win a Pom Bear Halloween Prize Pack - closing date 25/10


To celebrate the return of its frightfully tasty limited edition Halloween themed Pickled Onion flavour snacks (you can read our review here), Pom-Bear are giving visitors to the Bauer Radio website the chance to take the horror out of organising a Halloween party, with everything you will need from decorations to costumes and of course great tasting snacks!

With a full selection of things to make and do, this prize will keep your little monsters entertained from day break until sun set. The prize includes Halloween themed items, such as a children’s spooky fancy dress costume, face paints, eye patches, balloons, table decorations and more. Better still the prizes are packaged in a super spooky black witch’s cauldron, perfect for storing all your Halloween tricks or treats in.


Knowing that Mums and Dads struggle with ideas to make their terrifying gatherings both scary and fun, Pom-Bear has created a dedicated tab on its Facebook page (www.facebook.com/pombearuk) to offer hints and tips to cover decorations, fancy dress, games and of course nibbles for hungry witches and wizards to enjoy.

Whether you’re holding a monster gathering of friends and family or just getting into the ‘spirit’ of things at home, there’s something for everyone and chances to win further prizes!

If you want a Halloween party that you can remember for all the right reasons, then simply answer the following question:

What flavour Pom-Bear snack has returned to shelves for Halloween?
a. Prawn Cocktail
b. Pickled Onion
c. Smoky Bacon

Enter your details in the Rafflecopter widget to be in with a chance of winning.


Terms and conditions from Pom Bear: Prizes may vary from those shown in the image.

UK only. Closing date : 25/10/13

T & C's : Entries close at midnight on the closing date. Winners will be selected with a random number generator and announced on facebook, twitter and in the giveaway post subject line. Please note, you will be contacted by email and/or twitter and if I haven't heard from you after a week, I'll have to pick another winner. Prizes will be sent out by the companies or their PR directly to winners.

Limited Edition Halloween Pom Bear review


Just in time for Halloween, Pom Bear have brought back their Limited Edition Pickled Onion flavour snack, featuring a special vampiric (but still very cute) Pom Bear on the packaging !


The snacks have kept their iconic teddy bear shape - I was wondering if they'd have gone ghost-shaped in honour of Halloween, but I suppose they just wouldn't be Pom Bear if they weren't bear-shaped - and have adopted a pickled onion flavour. Pickled onion flavour crisps instantly make me think of the Monster Munch ones that I used to eat in my youth, but the Pom Bear ones have a much less acidic, more subtle flavour. 


I was very impressed to see that each 19g pack contains under a hundred calories : 96 calories, 0.4g of sugars, 5.1g of fat of which 0.5g saturates and 0.3g of salt. That makes them a pretty guilt-free snack for adults watching their waistline, as well as kids. They're also gluten-free and suitable for vegetarians.


The Halloween Pom Bears also have an on-pack promotion. A ghostly code will be hidden on the packs with opportunities for those who find and scan it to win a selection of great prizes, while also receiving hints and tips from the brand's Facebook page.

Speaking of prizes, I'll be back in a second with a fab Pom Bear Halloween giveaway right here on my blog too.

star rating : 4.5/5

RRP : £1.39 for 6 x 19g

Disclosure : We received the product in order to write an honest review.

Other reviews you may be interested in :

Kids' DVD review : Daddy, I'm A Zombie !

The Lunch Less Ordinary Blogger Challenge #3 : Magical Mys-deli Bus Tour


You may remember, last week I rose to two of the challenges laid down by Mission Deli Wraps for their Lunch Less Ordinary Blogger Challenge - putting the kids in charge of lunch for a week and coming up with a week's worth of ways to eat tomatoes. This week they upped the stakes ! We had the choice of these challenges :

1) Mini ‘wrappers’ - get the kids to make up the lyrics to a ‘wrap’ about their lunch
2) Have lunch in a less ordinary location! Send us your photos collage at the end of the week – we’re looking for the most creative wrap lunches and locations!
3) Have lunch in your own mini mardi gras – check out the images we’ve sent you as inspiration!
4) Lunchtime less ordinary bus tour. Take some wraps and go enjoy the sights of your local area


It's been a crazy week at work with non-stop meetings so I haven't had much time to get creative so far. Today, after spending the morning tied up in parent-teacher meetings, I bundled everyone on to a bus to see some of the local sights ... with some wraps to eat on the way of course. As I was the only one to know (roughly) where we were going, I told them it was a Magical Mys-deli Tour on the bus !


I wasn't actually that sure of where to head but we spotted something rather exciting on the way. Bye bye bus, hello friendly alpaca ! 


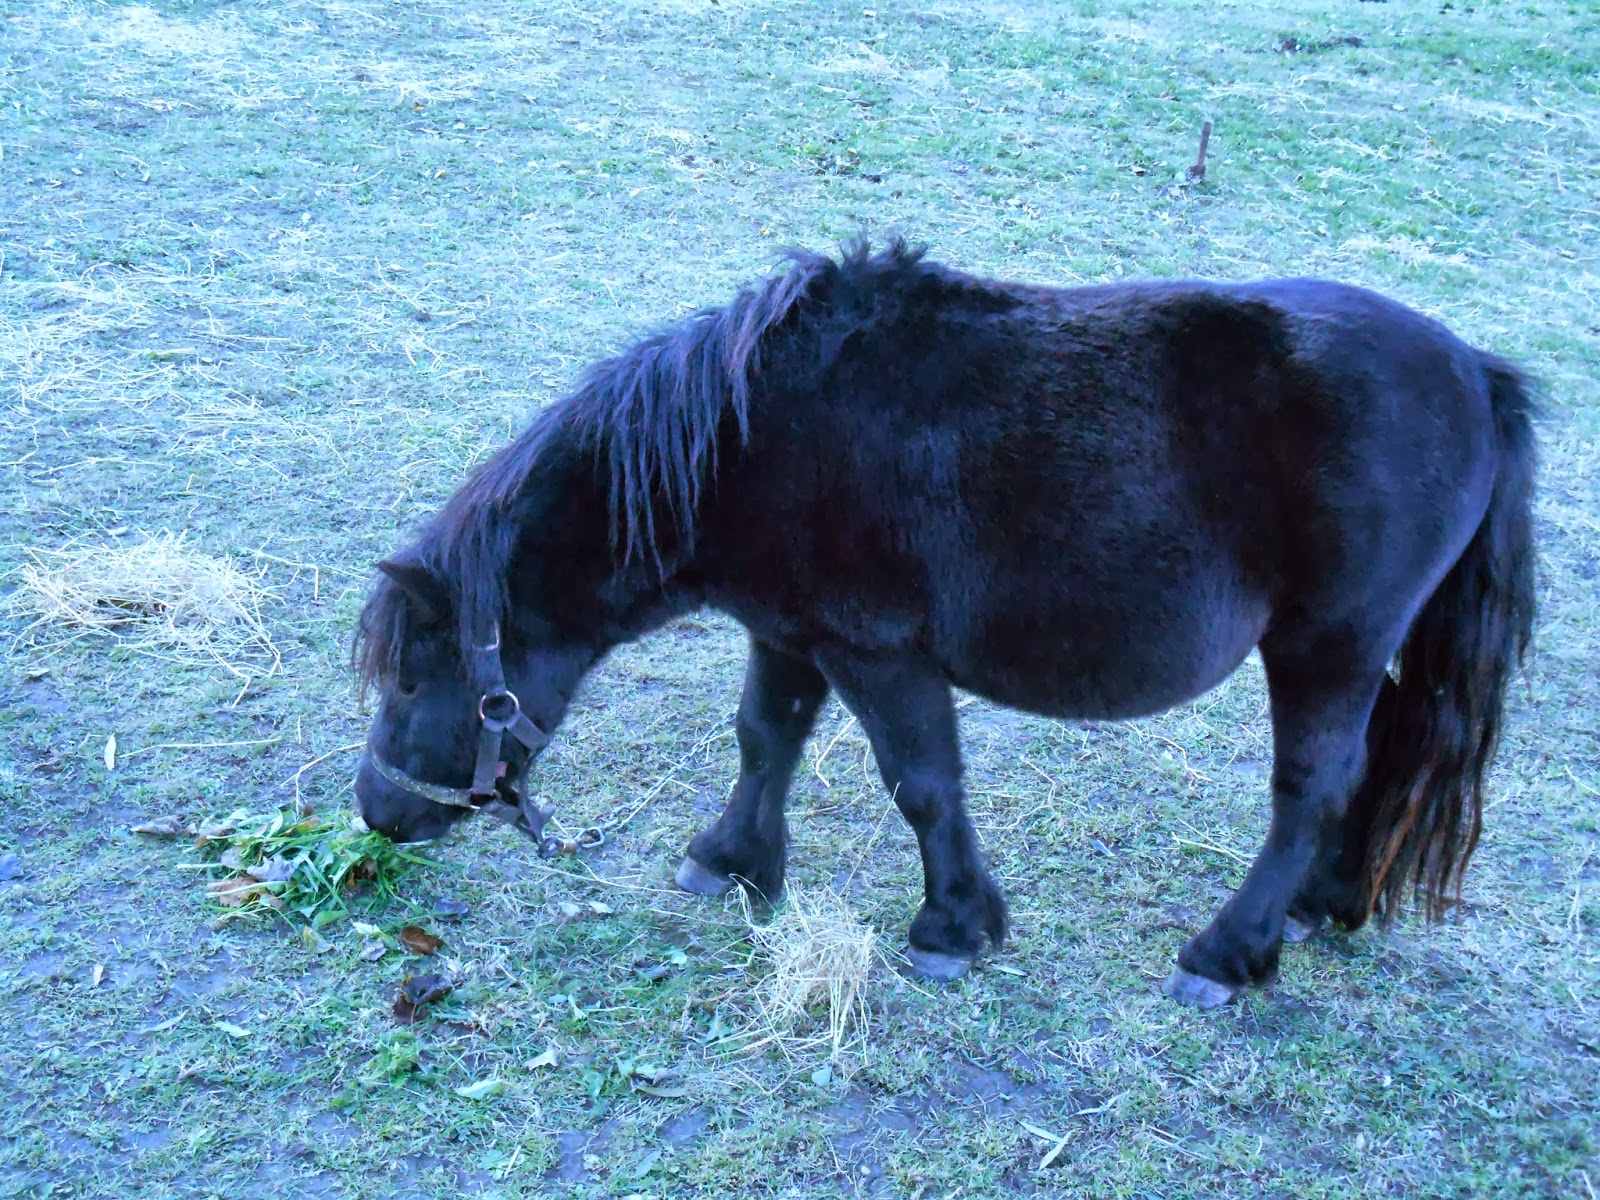
And a cute little (and apparently pregnant?) Shetland pony.


This could actually double up for the lunch in a less ordinary location challenge too - we had our lunch at the travelling circus ! Now, who's the biggest clown in this picture ?!


Pierre is looking very worried but it's not because he doesn't like his wrap.


He was rather concerned that this cheeky camel wanted to have a nibble on his lunch !


 I was more worried about the llama spitting at us !


Juliette got up close the cute little pony.


While Pierre had me in hysterics when he cried : 'Mummy, the llama's pooing lots and lots of Maltesers " !

Speaking of chocolate, I'd phoned the kids in advance to tell them to sort out some wraps for lunch to take on our adventure and I said they could put whatever they wanted in them, being as adventurous as they wanted. The result was ... Nutella, banana slices and silver balls from the baking cupboard ! They were actually really nice and the silver balls gave them a lovely added crunch. Not something I'd eat every day though, I must admit !


We headed off to a park next to make the most of the autumn sunshine.


You're never too old for playing on the swings and roundabouts !


The final highlight of the day was this huge horse chestnut tree.


It's been so windy for the past couple of days that literally hundreds of conkers had been blown down and the kids went crazy collecting a big bagful !

We had great fun on our lunchtime adventure discovering unexpected sights along the way. I can see the kids asking to do this again next week !


To help the nation liberate its lunch, Mission Deli Wraps have also launched a new on pack competition, giving you the chance to have lunch in some of the most exciting places in the world or £10,000 cash. To be in with a chance of winning, simply pick up a promotional pack, enter the unique code into the competition app on MissionWrapsUK Facebook or via the website at Missionwraps.co.uk, step in the Mission elevator and see which floor you visit!

The winning prizes include trips to experience:
-Mardi Gras in New Orleans
- La Tomatina in Valencia
- Holi Fest in India
- Camel racing in the Sahara
- Meeting an Amazon tribe

Runners up prizes include:
Rough Guide’s Make The Most of Your Time on Earth book and bespoke picnic hampers worth £50.

Disclosure : This is my entry for the Lunch Less Ordinary Blogger Challenge - find out more at  www.facebook.com/MissionWrapsUK. I'll be receiving some wraps and am in the running to win some fab prizes.

Other blogposts you may be interested in :

What's Cooking at The Madhouse next week? menu plan 11/10/13

What's Cooking at The Madhouse next week? menu plan 11/10/13


It's a busy week on the cards at work so it'll be a week of things I can cook without using my brain in the slightest ! I'll save the exciting new recipes for when I'm on holiday and have more time and energy.

Saturday

lunch - I have parent-teacher meetings (on a Saturday morning - *groans*) so it'll be a quick trip to McDonald's when we've finished

dinner -  homemade vegetable soup with freshly made bread (I'll do the bread, Madhouse Daddy can do the soup, as usual !)

Sunday

lunch - traditional Sunday roast - maybe chicken or pork

dinner - a sandwich or a bowl of porridge

Monday  

dinner - cottage pie with mixed root veg mash thatch

Tuesday

dinner - herby chicken thighs with ratatouille and rice

Wednesday

lunch -  tuna and tomato pasta bake - we seem to be having a pasta bake every week at the moment

dinner - something in the slow cooker - beef stew with carrots, parsnips, mushrooms, onions and potatoes maybe

Thursday

dinner -  grilled lime & garlic salmon fillets with rice and broccoli

Friday

dinner - cheese toasties with a side salad - it's the end of a long week so that's all I'm cooking !

***Click on my Menu Plans tag to see all my other weekly menu plan blogposts.***

Other blogposts you may be interested in :

Kid-friendly recipe : Smiley Spiral Apple tarts

If you're looking for something to bake with the kids this weekend, look no further !

Smiley Spiral Apple tarts


Makes 6; Prep=20 minutes, cook=15-20 minutes

Who knew apple tarts could taste this good? Little ones will love to get involved using pastry cutters and decorating the tarts with apple slices.

What you need
320 g/11¼ oz ready-made puff pastry
2 eating apples (Granny Smith or Royal Gala work best)
1 tablespoon lemon juice
50 g/1¾ oz unsalted butter, cut into 6 cubes
½ teaspoon ground cinnamon
25 g/1 oz soft light brown Sugar

What to do

Preheat the oven to 200ºC /400ºF/Gas Mark 6.

Roll out the puff pastry until it is 0.5 cm/¼ in thick. Using a 10 cm/4 inch pastry cutter, cut out 6 circles from the pastry and place them spaced well apart on a baking sheet.

Core the apples, then cut them into very thin slices and put them in a bowl with the lemon juice. Toss the apple slices well to coat them in the juice. Arrange the apple slices on top of the dough circles in a ‘flower’ pattern.

Place a cube of butter on each tart, then sprinkle the tarts with a little cinnamon (to taste) and the sugar.

Bake the tarts in the oven for 15–20 minutes until golden brown. Serve them warm or cold with vanilla ice cream or crème fraîche.

Can I help?
Roll, cut, fill. Tots of all ages get to play at being baker with these simple apple tarts. Making them is a brilliant activity for a play date. One friend rolls the dough, another cuts the circles and another fills the tart with pieces of apple.

Recipe kindly reproduced from Ella’s Kitchen The Cook Book - the Red One which is out now (£14.99, Hamlyn). Visit EllasKitchen.co.uk for more information


Other blogposts you may be interested in :

Kitchen Nomad Globe-Cooking Recipe : Pakistan - Chicken Yakhni Pullao


Warming comfort food from Pakistan sounded just the ticket on a grey, distinctly chilly day, so earlier in the week, I plucked the recipe for Chicken Yakhni Pullao out of this month's Kitchen Nomad box.


The recipe required lots of whole spices from the box - cloves, cinnamon, cardamom, coriander seeds and cumin seeds (that I told you about in the Raita recipe). It also needed black peppercorns (which I had) and fennel seeds (which I didn't).


Reading through the recipe (which you can find on the Kitchen Nomad website here), it actually sounded very similar to risotto, just with the addition of spices and yogurt. The Kitchen Nomad box contained a pack of Tilda Basmati Rice to use, which tasted lovely but didn't seem as exotic and authentic as many of the other ingredients in previous boxes. It looked like it had come from the local supermarket rather than some far-flung corner of the globe, but it did do the job just fine !


First it was time to heat the whole spices in oil to release their fragrance. I didn't know that these were called garam masalas - I was only aware of the ground garam masala curry powder. That's what I love about Kitchen Nomad boxes - it's as much a voyage of learning as it is of culinary discoveries.


Next you need to caramelise onions.


Then stir in yogurt. (I used fat free Quark again.)


Finally add the chicken. I was dubious about how well it would cook in the yogurt but it did and the result was soft, mellow chicken without the tough outer surface that browning it can sometimes give. Add the rice and water, cover and leave to simmer.


I found that I needed to rectify the seasoning slightly (well, quite a lot actually !) because it tasted a bit bland for my tastes, so I added extra ginger and garlic paste, garlic salt, smoked paprika and chat masala (which was also in the box) which gave it a nice lift. To serve, I sprinkled chopped fresh parsley and coriander leaves over the top and put a big dollop of raita on the side. It's quite a dry dish, with a similar consistency to an Indian biryani, so it does need raita or something wet to add some moisture. If you usually shy away from Indian/Pakistani food because you don't like spicy dishes, this is a great mild option.

Disclosure : I received a Kitchen Nomad box in order to write an honest review. In order to see all the different recipes (from Greece, Vietnam, Lebanon and Pakistan so far) and to find out how to subscribe for your own Kitchen Nomad box, head over to http://www.kitchennomad.co.uk/

Special discount code for Madhouse Family Reviews readers: if you enter the code MADHOUSE on the checkout page of the Kitchen Nomad website, you can enjoy £5 off your first box for any subscription plan.


Other blogposts you may be interested in :